How do I check if my engine’s flywheel key needs replacement?
Whether you want to know how to replace a flywheel or have questions about inspecting it, find a guide to Briggs & Stratton flywheel key below.
Read through the whole FAQ or jump to the most relevant sections:
What is a small engine’s flywheel?
How do I remove the flywheel key?
How do I check and inspect the flywheel key for replacement?
How do I install my new flywheel?
![]() WARNING: Always read the engine and equipment manual(s) before starting, operating, or servicing your engine or equipment to avoid personal injury or property damage. See an authorized dealer or contact Briggs & Stratton if you are unsure of any procedure or have additional questions.
WARNING: Always read the engine and equipment manual(s) before starting, operating, or servicing your engine or equipment to avoid personal injury or property damage. See an authorized dealer or contact Briggs & Stratton if you are unsure of any procedure or have additional questions.
Find all Engine Safety Warnings
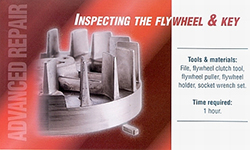
Before getting started, make sure you have the right tools for this small engine repair project:

The flywheel on your small engine was originally designed to store the momentum from combustion to keep the crankshaft turning in between the engine's power strokes.
Flywheels on today's small engines serve several other purposes. The fins help cool the engine by distributing air around the engine block. The fins also blow air across the air vane on a pneumatic governor, maintaining the desired engine speed (see "Governor System"). Magnets mounted on the outside surface of the flywheel are required for ignition. On engines with starter motors, lights or other devices, magnets mounted inside and outside are at the heart of the electrical system.
Finally, if a lawn mower or tiller blade hits a rock or curb, the flywheel key can sometimes absorb the damage, reducing repair costs significantly. Always check for damage by removing the flywheel to inspect the key and the keyway, the key's slot on the crankshaft. The soft metal key must eliminate play between the flywheel and crankshaft.
- Step 1: Disconnect the spark plug lead and secure it away from the spark plug. Then, loosen the bolts holding the shroud in place and remove the shroud.
- Step 2: If the engine is equipped with a flywheel brake, remove any cover and disconnect the outer end of the brake spring

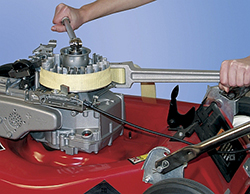
- Step 3: If your engine is equipped with a flywheel clutch, remove it while holding the flywheel with a flywheel holder or a flywheel strap wrench. If it is attached with a nut, use the flywheel holder as a brace, and remove the retaining nut with the appropriate socket

- Step 4: With the flywheel nut threaded onto the crankshaft, install a flywheel puller so its bolts engage the holes adjacent to the flywheel's hub. If the holes are not threaded, use a self-tapping flywheel puller or tap the holes using a 1/4 X 20 tap.

CAUTION! Never strike the flywheel. Even a slightly damaged flywheel presents a safety hazard and must be replaced.
- Step 5: Rotate the flywheel puller nuts evenly until the flywheel pops free. Then, remove the flywheel and key.

Step 1: Check for cracks on your crankshaft or broken fins. Replace them if you find such damage. The tapered sections must be clean and smooth, with no play between the two.
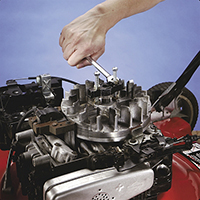
Step 2: Inspect the keyway and flywheel for damage. Slight burrs may be removed with a file. Then, make certain there is no play or wobbling when the flywheel is placed on the crankshaft.
Step 3: Inspect the flywheel key. If there are any signs of shearing or if you have doubts about its condition, replace it. It's simple and inexpensive.
First, obtain a new flywheel key designed for your make and engine model from your Briggs & Stratton authorized dealers.
Place the flywheel on the crankshaft and look through the flywheel hub to align the keyways on the flywheel and crankshaft.
With the flywheel in place, place the key in the keyway; it should fit securely. If you feel play, check to see if the key is upside down. Debris can also prevent the key from seating in the keyway.
Once the key and flywheel are securely in place, reattach the flywheel nut or clutch. Consult your authorized dealers for the torque specifications for your make and model.


